Showing posts with label Commentary. Show all posts

Meal Planning on a Budget - Sample Menu

Last night, I had the pleasure of being a speaker at Ignite SJ. This event invites people from various walks of life to address a crowd for just 5 minutes, with 20 slides that automatically change every 15 seconds. I was asked to speak about meal planning on a budget, and whittling down my favourite ideas into 15 second intervals was no small task. Those who know me, know that I have a hard time shutting up about things I'm passionate about! (The event was recorded and I plan to share the videos once they are posted.)

(Photo courtesy of Mark Burnett, @burnettisms)

During the question and answer period, I was asked how long it takes to do my weekly meal plan. I answered that it takes me about 20 minutes, and that I think the time is a good investment. However, as I sat down with the newest flyers this morning, my meal plan basically wrote itself in well under that estimate. There are so many great prices this week on foods that just asked to be served together!

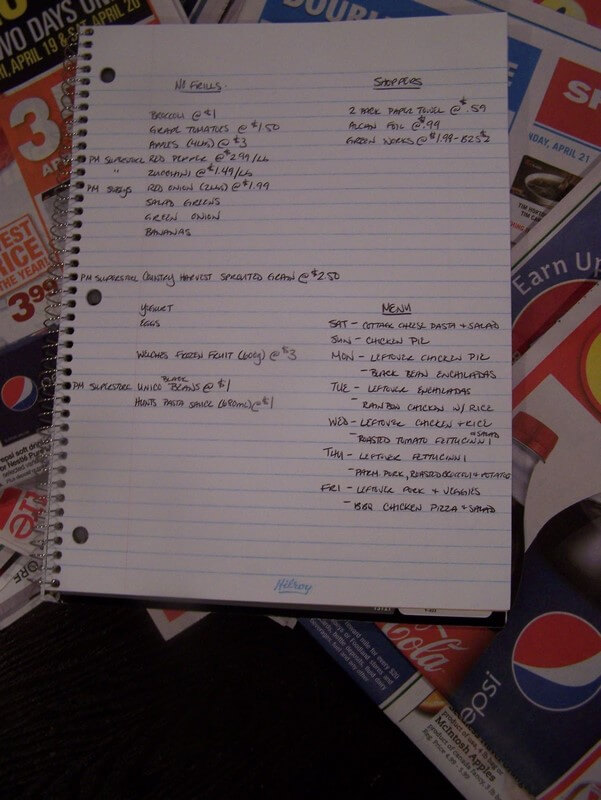
For those who weren't in attendance last night, you can read this post (from 2012) about how I meal plan around the sales. I want to take that how-to a step further today by showing you an actual meal plan for the week, using the current sales in our area. Remember - you don't need to run all over town to get these specials. Simply bring your flyers to a store that price matches! I do this at No Frills each week, but it can also be done at Walmart or Giant Tiger. I also generally stop at On The Vine each week because they offer amazing weekly specials. And their staff offers to carry my bags out to the car...where can you get that kind of service anymore?!

Below, I'll highlight the best deals at each store followed by the week of dinners I have planned.

Superstore
Welch's frozen fruit @ $2.99
Pineapple @ $1.99
Maple Leaf bacon @ $3.77

Giant Tiger
3 Lbs MacIntosh apples @ $1.99 (plus $1 off if you use the "Coupgon" app at Giant Tiger)

Sobeys
Pork loin roast @ $2.99/Lb

Walmart
Cucumbers @ $0.88
Avocado @ $0.97

No Frills
Tangerines @ $0.99 /Lb
Cauliflower @ $2

On The Vine
Ground beef @ $1.99 /Lb
Tomatoes @ $0.97/Lb
Grape tomatoes @ $1.97
Watermelon @ $3.99
Mushrooms @ $1.47
Bell peppers @ 2.97/ 4-pack

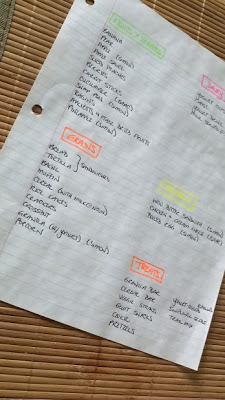
The dinners I have planned are based around these sale items, which appear in parenthesis below:

  • Spicy Beef & Cucumber Wraps (ground beef and cucumbers)
  • Roasted Tomato Pasta (grape tomatoes)
  • Veggie Pizza with my favourite thin crust (tomato, mushrooms, peppers)
  • Tacos (ground beef, tomatoes, mushrooms, peppers, avocado)
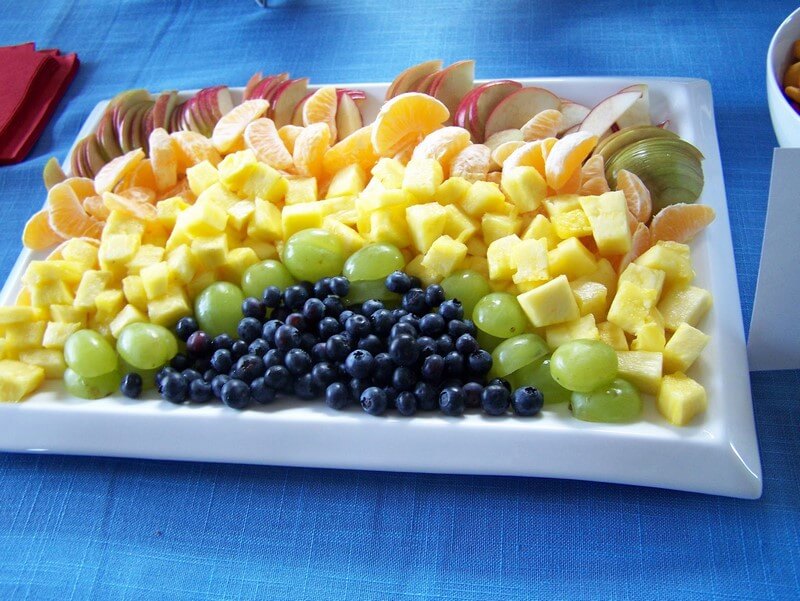
  • Breakfast for Dinner: Bacon (bacon), veggie quiche (tomato, mushrooms, peppers), fruit salad (watermelon, tangerine, pineapple), blueberry muffins (frozen fruit) 
  • Apple Cinnamon Pork Loin  (apples, pork loin) with roasted cauliflower (cauliflower)
  • Pork sandwiches (using leftover pork loin) with sauteed veggies (peppers, mushrooms)

Of course, my grocery list will need to be rounded out to include a few additional items for the recipes above, along with things we need for breakfast, school lunches, and to replenish the pantry. I'm also always keeping my eye open for "stock up-portunities" for items with a long shelf-life that my family uses regularly. Saving money on those staples leaves lots of money in the budget for the fresh healthy foods I want to serve my family! {Those in attendance last night, you can laugh about my laundry detergent stash here. :) }

I'd love to hear your feedback about this process, or any question you might have about meal planning. As I said last night, we can all live well and eat well if we spend thoughtfully!

Budgeting for Better Life

I interrupt all the recipe sharing to post about budgeting. I have shared before how I keep our grocery budget on track, but grocery spending is only a small piece of the pie (and because of this spreadsheet I know our groceries are 12.27% of the pie). After some prompting from friends, I'm sharing how I budget for our family.

Let me begin by saying that budget isn't a bad word! Having a budget (or a spending plan) can actually be very liberating! When you have planned to spend and you have the money in hand, spending is so much more enjoyable. Budgeting doesn't mean you don't take vacations....it means you pay for vacations with cash. Budgeting doesn't mean that you can't go out for dinner, it just means you are a little more selective of when you go out. Our lives have absolutely changed for the better since we started budgeting. Who knew we could actually live a more comfortable and fulfilling lifestyle on one income? I am a firm believer than you can have it all, you just can't have it all at once

We are a single-income family. After my second maternity leave, I didn't return to work. Being a stay-at-home mom is something we always had in mind as part of my role in our family, but the timing wasn't carved in stone. We worked hard to pay off my student loan and our consumer debt before reducing our income. We also took a long hard look at what we were spending. For example, we drove an older vehicle at the time. It was paid for, but we weren't aware of how much we had been spending on maintenance & mileage. Once we added up 6 months of repairs, maintenance, and gas, we realized that we could be driving a new and more fuel-efficient vehicle for the same monthly costs! Our housing situation was similar. We lived in a home on the outskirts of the city, which meant our mileage was higher and our sense of community was lacking. The home itself also had significant costs in maintenance and repairs. We ended up building an efficient home in our ideal neighbourhood, close to friends, family, and Josh's workplace. Our daily life improved, and money was saved. We never would have made those big changes if we hadn't taken a good look at the numbers. 


The first page is the overall budget or master plan. 

This budget is based on 2 biweekly paycheques a month, even though there are 26 biweeklies in a year. We put those extra 2 payments directly into savings. It helps boost our savings, and it is easier to budget based on a regular income every month. Similarly, we don't include overtime, commissions, or incentives in our budget. Those incomes can also boost savings or be used for "extra" spending.

  • Step 1: Fill in your income. 
  • Step 2: Fill in your fixed expenses.   I t automatically will calculate what percentage of your income is being spent on each category.  
  • Step 3: Note the "difference" (under net income). That's how much money you have left after your fixed expenses to fill in your variable expenses. 
  • Step 4: To begin figuring where you want to set those variable budgets, you should go back through the past several months to figure out what you have been spending. If you don't have the receipts, check your credit card or banks statements and look at your transactions in different categories. Once you add up these totals, ask yourself how often you think you've used cash at those stores and add a guesstimate of that amount. Likely, this total will scare you. That's okay - things will get better! And if you didn't know where you were coming from, how could you look back pleased with how far you have come? 
  • Step 5: If you want to have a real TV/ Gail Vaz-Oxlade moment, put the amounts you have been spending into your budget sheet temporarily. Does it balance? Are you shocked by the percentage of your income that you spend in some categories?
  • Step 6:  As you look at the figures from past months, decide if you are comfortable putting those numbers in your budget or if you want to reduce some categories.  Again, as you fill in your budgeted amounts,    it will calculate what percentage of your income is being spent on each category.   Keep watching the "difference"...your budget has to balance!

Note: There is only so much you can do to cut back your fixed expenses, but I've been pleasantly surprised by how much we have been able to trim down our variable expenses just by putting it all on paper and being conscious of it.


The second page is where I track our variable spending. 

We bring home all of our receipts and every day or two I put the amounts in the tracker, so any given time we know month-to-date where we stand (groceries, entertainment, etc). This also allows us to know how much money we have left in categories that we budget for monthly, but only pay for a few times a year (hobbies/membership, Christmas, etc). For instance, when Josh goes to his basketball provincials, that expense will come out of hobbies/memberships. Most months we don't spend anything in that category, but the money sits in our account earmarked for those expenses when they come up, and that variable tracking sheet shows us how much we are supposed to be spending on it. If there are multiple receipts in a week to track in one category (and there always is with groceries), I just open a comment to list the totals, then add them up and put them in the cell.

The third page is net worth. 

This sheet is pretty self-explanatory. Fill in the amounts of what you own and what you owe. It is easy to feel like you are ahead of the game if you aren't living paycheque to paycheque or if you are looking at a pile of cash in the bank...but if you owe a lot of money, things aren't as great as they appear. Being realistic and looking at the cold hard facts is important if you want to live the good life and plan for your future.


This all may  sound more complicated than it really is. Don't get overwhelmed! Once your sheets are set up, if doesn't take more than a couple of minutes here and there to input expenses on the receipt tracker. All you have to do is begin, and take one little step at a time. I started doing this practice out of necessity, but it has become a way of life that I really enjoy. I hope you find the same thing. I welcome any of your questions or comments below or via Email. Bring it on! :)


Christmas Baking For Sale

A message for all my local readers...


After requests from friends and family, I've decided to sell some Christmas baking this year. I am starting with my two favourite traditional Christmas cookies: shortbread cookies and gingerbread cookies. Both are made with old-fashion ed recipes in small batches using quality ingredients, just as I would prepare them for my own family. A sample is pictured, and the prices are as follows:

  • Pressed Shortbread Cookies: $7 a dozen or $12 for 2 dozen
  • Iced Snowflake Gingerbread Cookies: $10 a dozen or $18 for 2 dozen
  • DIY Gingerbread Men (for those who like the tradition of decorating cookies with children, etc): $7 a dozen or $12 for 2 dozen

Orders can be placed by Emailing me. Various pick-up dates can be arranged to suit.


Food Bloggers of Canada Featured Blog

I was delighted to be Food Bloggers of Canada's Featured Blog of the week! I shared all kinds of things with them, including some of my favourite posts, my favourite gadgets, and how sweet my husband is. (Awwww....) 

See my full Q&A with them here!


If you are looking for more Canadian Food Blogs to follow, be sure to check their member directory.


Food Bloggers of Canada

On My List...

I've been told by a few sources that I've been slacking off on my blog lately. It's true - 3 babies will do that to you. Don't argue that the three-year old isn't a baby anymore. I'm clinging to it, okay? ;)  We're all still definitely eating over here, but I'm not experimenting with any new recipes - just sticking with old reliable ones, along with some of meals I froze in the fall.

To entertain you until I can be a better hostess, I thought I'd share with you some of the recipes that are currently sitting on my 'to try' list. Maybe you will try some of them before me and give me your reviews?

 
And no particular recipe for this, but my friend Sarah and I want to recreate the Winter Bruschetta from the Saint John Ale House. (Does it get any better than a combination of maple roasted squash, walnuts, balsalmic syrup, and goat cheese?)

Christmas Baking 2010

What's on my Christmas baking list this year, you ask? Well...

It just wouldn't be Christmas without Nanny Mcnulty's Shortbread Cookies, so those are already made.

Since I discovered this great Soft Gingerbread Cookie recipe last year, it's a new tradition and the dough is chilling now.

I have my Knock-Off Subway Cookie dough in the freezer for last minute hostess gifts or visitors.

I'm trying a few new things this year too: Peppermint Fudge is already made (which I'll write my own blog post about shortly). Red Velvet Cream Cheese Swirl Brownies are on deck. And I just found this Peppermint Bark today that might need to happen too (and it's especially easy because I already have all the ingredients).

Also in the works this week are items for my Dad's birthday dinner on Christmas Eve: Seafood Lasagna and Four-Layer Pumpkin Cake.

A lot of those items are still on my "to do list", so I better go get busy!

My New Addition

Allow me to introduce the newest gadget to grace my kitchen.

This Black and Decker 500 Watt food processor has an 11 cup bowl and 3 changeable blades...and it was 60% off! The regular retail is $99.99 and Canadian Tire has it for $39.99 this week. Yay! And knowing that cupboard space is at a premium, I chose 3 less-used kitchen gadgets to post on Kijiji to make some space and pay for the new item. I'm so proud of me! :)

So, what's your favourite thing to make in your food processor?
Do share - I can't wait to use it!

Dr Seuss Birthday Party

Cooking and party-planning are two of my favourite things and, luckily, they go well together. Because of his current favourite books, we decided to put a Dr Seuss spin on Simon's 2nd birthday party.

Here's the whimsical Seussical spread

 Green Eggs (no ham): sugar cookies with this icing
Where does one get a cookie cutter shaped like a fried egg? Just bend a round coockie cutter until it looks right!

There's a Wocket in my (pita) Pocket: broccoli slaw with this dressing in mini-pitas

Hop on Pop(corn): popcorn with this seasoning
 Three Cheese Trees (from Fox in Socks): cubes of marble cheddar on styrofoam trees (I swear this looked better in person!)
  
Yertle the (caramel) Turtle: pretzel rolo turtles, with topped with M&M's instead of pecans to be nut-free

One Fish. Two Fish, (not all) Red Fish, (or) Blue Fish: naturally coloured Goldfish crackers


Yink's Pink Ink Drink: pink lemonade

No clever name, but these treats just looked so fun and silly. Similar to Rice Krispie squares but made using Trix cereal and rolled into balls, the bright colours and abnormal shapes were a hit with the kids!
 

Rainbow Fruit Tray


Chocolate Fudge Cupcakes with this icing, and this filling (+ 3 TBSP raspberry jam) & homemade toppers
My take on Truffula Trees was really simple, but they had a big impact with the high-ceilings in our living room and kitchen. They were each just made out of two pieces of bristol board: one for the top, and one cut into wiggly strips to make the trunk. (And having picked up the bristol board at 3 for $1, making each tree for $0.66 is pretty great bang for your buck!)


Thing One and Thing Two were positioned running up the stairs from our entryway, greeting Simon's guests. I projected an image found online, traced it on to bristol board, coloured it, and cut them out. I loved the "coming to life" effect that the third dimension of the ribbon and balloon gave them.


I made these pom poms in alternating red and white tissue paper that were hung with fishing line from the ceiling, but they were somehow missed in our photos.


We sent this invitation to his friends to invite them (and their parents) to join us.

Our kids' birthday parties are always donation parties, where we ask that our guest bring a donation of non-perishable food for our nearest food bank in lieu of a gift. For our donation box this year, I used a quote from The Lorax that got people talking: "Unless someone like you cares a whole awful lot, nothing is going to get better. It's not." One person even asked if they could have the sign - and of course, I obliged!

I had quite a few other ideas for food and decorations that just didn't come into fruition in time for the party (chasing two toddlers at 8 months pregnant will do that to you), but I'd be happy to share some ideas if you'd like to leave a comment.


I'm linking this up with  What's Cooking with Ruthie's Super Saturday Show & Tell , and  Thirty Handmade Days Linky Party !

The CCC Quest: Recipe 2

Still on the hunt for the closest thing I can make to a Subway chocolate chip cookie. The next recipe to hit my mixer is this one, courtesy of Lisa. They were soft and chewy and delicious. I think the milk really added to the great texture of this cookie. Still not exactly what I am hunting for though...the search continues!

2 1/2 C flour
1 tsp baking soda
1/2 tsp salt
1 C butter, room temperature
1 C firmly packed brown sugar
1/3 C white sugar
1 egg
2 1/2 Tblsp milk
1 1/2 tsp vanilla
1 1/2 C chocolate chips

Combine dry ingredients and set aside. Cream butter and sugars until smooth. Add the egg, cream, and vanilla, and beat well. Add the dry ingredients and mix thoroughly. Stir in chocolate chips. Drop by spoons onto baking sheets.  Bake at 350` for 10-12 minutes, or until lightly golden. Allow to cookies to test on the baking sheet for several minutes before removing to wire racks.


The CCCC Quest: Recipe 1

I have been craving the soft and chewy chocolate chip cookies from Subway. I am setting off on mad hunt for the perfectly thick and chewy chocolate chip cookie: The CCCC Quest. Dramatic? Absolutely! :)

I tried a little variation on this recipe yesterday. They were a hit with the kids because I topped them with a Smartie from their Halloween candy. They were good, but I enjoyed them even more on the second day.

1 C brown sugar, packed
1/2 C white sugar
1 C butter
2 eggs
1 1/2 tsp vanilla
2 1/2 C flour
1 tsp baking soda
1 tsp salt
1 C chocolate chips

Cream sugar, butter, eggs, and vanilla. Add dry ingredients and blend well. Stir in chocolate chips. Drop by spoon onto baking sheet. Slightly push a Smartie into the top of each one (so your kids can yell "pink button cookie please!" like mine do). Bake at 350` for approximately 10 minutes.


Cake Cones

This is less of a recipe, and more of an adorable idea. I made these cake cones for my son's 3rd birthday party, and the kids loved them. I saw the idea from a local cake maker (Thank you 'Cake Me Smile!'), but the party didn't have the budget for me to buy them for all of our guests. I think my DIY's turned out pretty cute though!

First, make Bakerella's cake balls. Just make the centres and don't coat the yet. (Mine are chocolate cake and chocolate icing. Mmmmm...)


Place your cake balls on a cookie sheet, and top with a mini ice cream cone. Chill in the fridge (or freezer, if you are impatient like me) until firm.


Once the cake balls are firm, melt chocolate (in this case, white chocolate) in a double-boiler. Dip each cake ball/cone in the melted chocolate and top with sprinkles.

An easy way for them to dry and harden standing up was to poke them into the bottom of egg cartons. Isn't it cute how the chocolate drips down the cone a little like melting ice cream?

Love 'em! Can't wait for another reason to make them ;)


5 Ingredients. 10 Minutes.

Our lives are busy and our fridge isn't always full, but we always try to eat wholesome meals. I'm sure I'm not alone! If you are looking for healthy meals that won't take all day and won't break the bank, you are in for a treat: A friend just sent me this link to a free E-cookbook, courtesy of Stone Soup.

I'm mostly excited to try the following recipes. Which one should I incorporate into this week's menu?

White Bean and Parmesan Puree
Simple Soba Noodle Soup
Veggie Laksa
Tahini Lemon Dressing

Pack #1

It was worth the excitement and the wait: Look at the abundance of lovely fresh local food!

This week's pack included:
Spanish Onions
Beet Greens
Kale
Broccoli
Bok Choy
Romaine
Dill
Cilantro
Arugula
Spinach
Swiss Chard
Free-run Eggs
Multi-Grain Bread made with unbleached Spearville flour
...Oh my!

If you are curious what I plan to make with these goodies, check out this post...and come back throughout the week for pictures, recipes, and reviews.

First CSA Pack Tonight!

I have already mentioned several times how excited we are to be taking part in a local CSA program, Dave's Produce Packs. Tonight is our first pick-up, and I am excitedly planning our menu for the week. I plan to build our menu around the weekly produce packs all summer, and I'll share all the plans and recipes with you as I go. If you have any ideas or recipes to share with me, please comment! I'm constantly stockpiling recipes to try.

We have been told that today's pack will include the following:

Spanish Onions
Beet Greens
Kale
Broccoli
Bok Choy
Romaine
Dill
Arugula
Swiss Chard
Free-run Eggs
Multi-Grain Bread made with unbleached Spearville flour


And here's what I am planning to make so far:

BBQ Pizza with roasted garlic, caramelized onions, and steamed swiss chard
Dill potato salad
Green salads
Roasted broccoli pasta
Baked kale chips
Crustless quiche with any of the veggies
Swiss chard with chickpeas
Bok choy chicken soup or bok choy stirfry

Rhubarb Coffee Cake

After my rhubarb crumble barely made a dent in the rhubarb I picked last week, I've been searching for other recipes to try with it. (My friend Laura found these bars, which look delicious and so much more delicate than you would expect rhubarb to be.)


I am just coming to realize that I've never blogged my favourite rhubarb recipe ever, although I made reference to it here. This is a delicious recipe that I've tweaked gradually over time, and I don't think that I've ever made it without someone asking for the recipe.
 
I got a message from my friend Blythe, who has a big rhubarb plant and wanted to try the crumble. I also got a message from Jenn, who wanted to try baking with rhubarb for the first time. I told them both that the crumble was good, but they should really try this coffee cake. If you are going to try one new rhubarb recipe this spring, make it this one!


1 ½ Cups Packed Brown Sugar
2/3 Cups Vegetable Oil
1 Egg
1 tsp Vanilla
2 ½ Cups Flour
1 tsp Salt
1 tsp Baking Soda
1 Cup Milk
1 ½ Cups Rhubarb, chopped
1/3 Cup White Sugar
1 Tblsp Butter, Melted
¼ Cup Walnut Pieces

Preheat oven to 350 degrees F (175 degrees C). Grease two 9 inch round pans.


In a large bowl, beat brown sugar, oil, egg, and vanilla together until smooth. Combine flour, salt and baking soda; add to sugar mixture alternately with milk. Beat until smooth. Stir in rhubarb. Pour into prepared pans.

In a small bowl, combine white sugar and butter or margarine. Stir in 1/4 cup walnuts. Sprinkle topping over batter.

Bake for 30 to 35 minutes, or until the cake tests done.

Product Review and Two New Recipes

I posted a while back that I was going to do my first product review. Well, without further ado...

This is my gorgeous new Rachel Ray Bubble and Brown Stoneware. It's a set of two (1.25 quarts and 2.25 quarts) pieces of stoneware, each with built-in handles and low curving sides. They are dishwasher, microwave, freezer, and oven safe, and they nest for compact storage.
So far, I love these little guys!


With the 2.25 quart dish, I made The Farm Chick's Rhubarb Crunch. My toddlers helped me pick oodles of rhubarb yesterday, some for this dish and lots for the freezer. What are your favourite rhubarb recipes?

4 cups rhubarb, chopped
1 1/4 cups flour
1 cup oats
1 tsp cinnamon
1 1/4 cups packed brown sugar
1/2 cup melted butter

Sauce:
1 cup sugar
2 tblsp cornstarch
1 cup cold water
1 tsp vanilla

Mix together the flour, oats, cinnamon, brown sugar and melted butter. Press half of the mixture into your greased baking dish. Top with chopped rhubarb. Whisk sauce ingredients together in a glass bowl. Microwave for 3-5 minutes or until thick, clear, and bubbly. Pour sauce over rhubarb, and top with the remaining flour mixture. Bake at 350' for approximately 35 minutes, or until bubbly and golden.

It's supposed to be for dessert tonight, but I already snuck a taste. Okay, more like 11 tastes. It's delicious! And how cute does it look in the new stoneware?


Mmmmm...


And what did I make in the 1.25 quart dish, you ask? Martha Stewart's Macaroni and Cheese! This recipe made enough for the 1.25 quart dish, plus 12 "mac muffins"made in muffin tins for the kiddies. (Thanks for the idea, Weelicious!)


*Product was provided for review purposes*


Grill with Martha

Looking for some new Summer grill recipes? Look no further!

Download your free copy of Martha Stewart's Summer Grilling Cookbook, courtesy of Sirius Radio. Thanks for the heads-up, For The Mommas!


Farm Fresh Eggs

One of my sister's coworkers has a farm and often brings fresh eggs in to work. I was lucky enough to be handed some last week, and couldn't believe the size of them! In the photo below, the white egg is from the grocery store and is considered "large". The brown egg is direct from the farm and, although it might be tough to tell in the photo, it's about one and a half times bigger than the store-bought egg. It is both longer and bigger around, and could probably make a pretty hearty one-egg omelet!

I just found out that the CSA we are taking part in this summer is going to be including some eggs. YAY! If you are in the Saint John area and want to get in on it, check out the group "Dave's Produce Packs" on Facebook. I plan to post recipes regularly all summer to go along with what is provided in the weekly pack.

Until then, here's my side-by-side egg comparison. :)

Upcoming Product Review

Let's face it - casseroles are often easy and economical choices, but they carry a certain je-ne-sais-quoi blah factor as soon as you say the word. I am so excited to try these great pieces of Rachel Ray stoneware, currently being sold by CSN, which should add something fun and contemporary to any of my casserole recipes. CSN offers a HUGE range or products, from TV stands to bedding to co okware to diaper bags!

Check back soon for my review. Do you have an idea of what my first "cool casserole" should be? If so, please leave a comment with your link/recipe!
Disclosure: This item is being provided for review purposes.