Showing posts with label Sweets. Show all posts

Cheesecake for Two

Even after the Molten Lava Cakes for Two and the Tiramisu for Two, you are still looking for dessert ideas for you and your valentine? Okay....how about Cheesecake for Two? These two little cheesecakes come together in less than 5 minutes before baking. It couldn't be any easier. Please don't buy one of those bad generic frozen cheesecakes! Making it yourself is so much more delicious, not to mention less expensive!


2 Golden Oreos
1 tsp butter
1/4 C (2 oz) cream cheese
1 egg white
1 Tblsp sugar
pinch of salt
splash of vanilla

Crush Oreos. Melt butter and combine with cookie crumbs. Press firmly into the bottom of  2 lined muffin tins. Beat remaining ingredients very well until smooth. Divide between the two muffin tins. Bake at 325` for 20-25 minutes or until almost set. Allow to cool to room temperature before chilling. Top as desired with fruit, chocolate, caramel, chopped chocolate bars, etc. Use different crumbs for the crust to change the flavours further. The possibilities are endless!

Tiramisu for Two

Your response to the Molten Cakes for Two was fantastic! It made me think you must be hungry for desserts made for two, so I thought I'd give you another idea before Valentine's Day.

My husband doesn't like coffee, but he loves tiramisu. Go figure. The recipe below is scaled down from the tiramisu recipe that I shared a few years ago, a deliciously inauthentic recipe that is less expensive than traditional tiramisu but still has the same great flavours. I've omitted the egg here, as some folks are really hesitant to consume raw eggs. (For the record, I'm not one of them. Hello? Cookie dough?). This version still sets up well, and you won't miss the egg from the larger version of this recipe.


1 C ricotta cheese
1/3 C white sugar
1 tsp spiced rum
8 Lady Finger biscuits
1/2 C espresso or strong coffee
cocoa, for dusting (optional)

Combine ricotta, sugar, and rum until smooth. (A food processor or an immersion blender is perfect for this.) One at a time, dip Lady Fingers in coffee and lay in cross-wise in a loaf pan. Lay four coffee soaked lady fingers across the bottom of the pan. Top with half of the ricotta mixture. Repeat with remaining 4 lady fingers. Top with remaining ricotta mixture. Dust with cocoa, if desired. Cover and chill for at least 6 hours before serving. Preparing this the day before serving is ideal.


Lava Cakes For Two

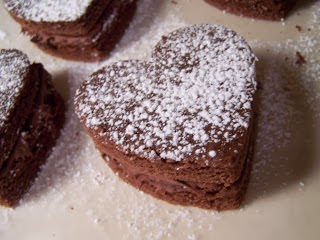
Valentines Day is coming. If you are planning a nice dinner at home, don't forget about dessert! An impressive dessert doesn't mean making a huge cake (that you will eat for days) or spending hours of your time. These molten cakes for two take about 5 minutes to prepare and 10 minutes to bake. They are rich and decadent, and the perfect Valentine's Day dessert. Either using the recipes below or changing the flavours with different baking chips, surely you can find one to suit you and your sweetheart.

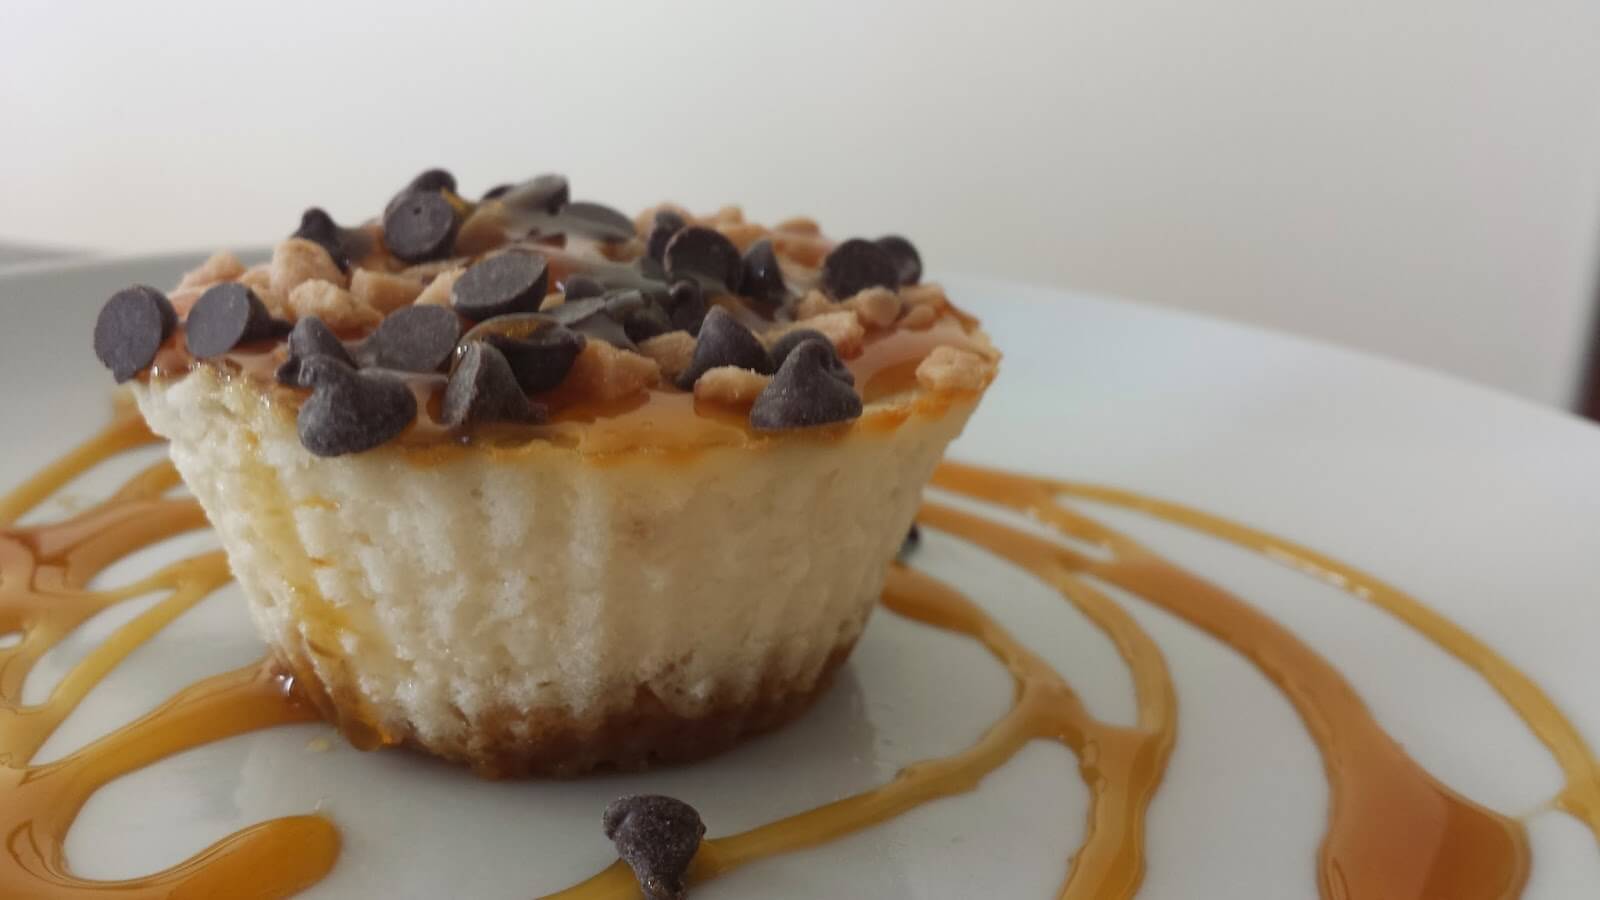
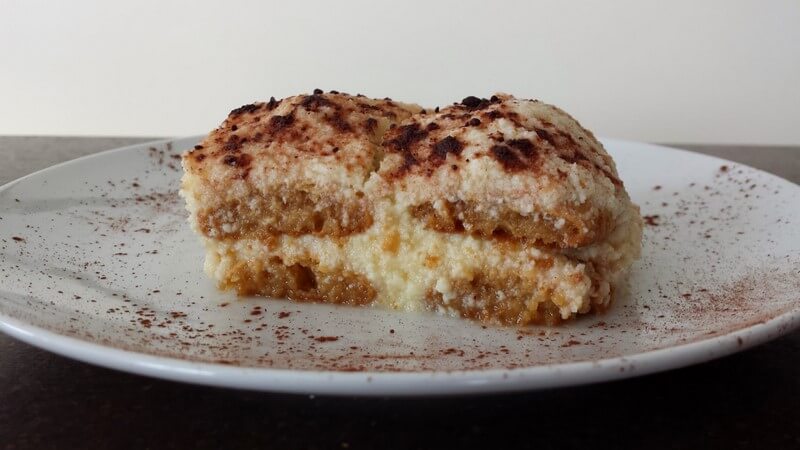
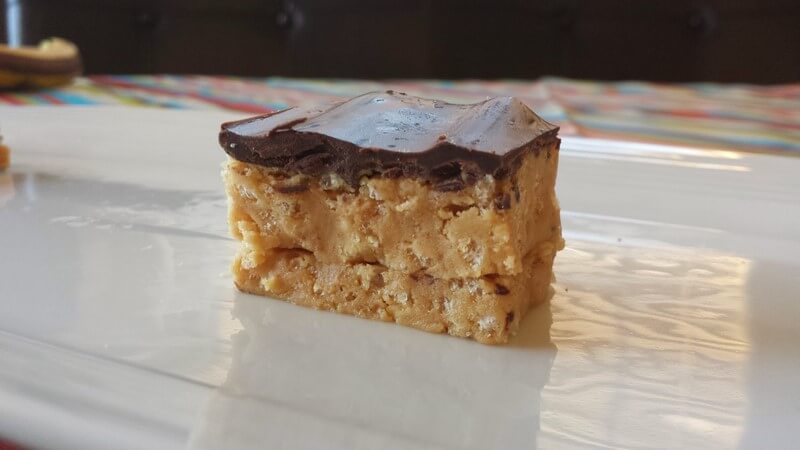
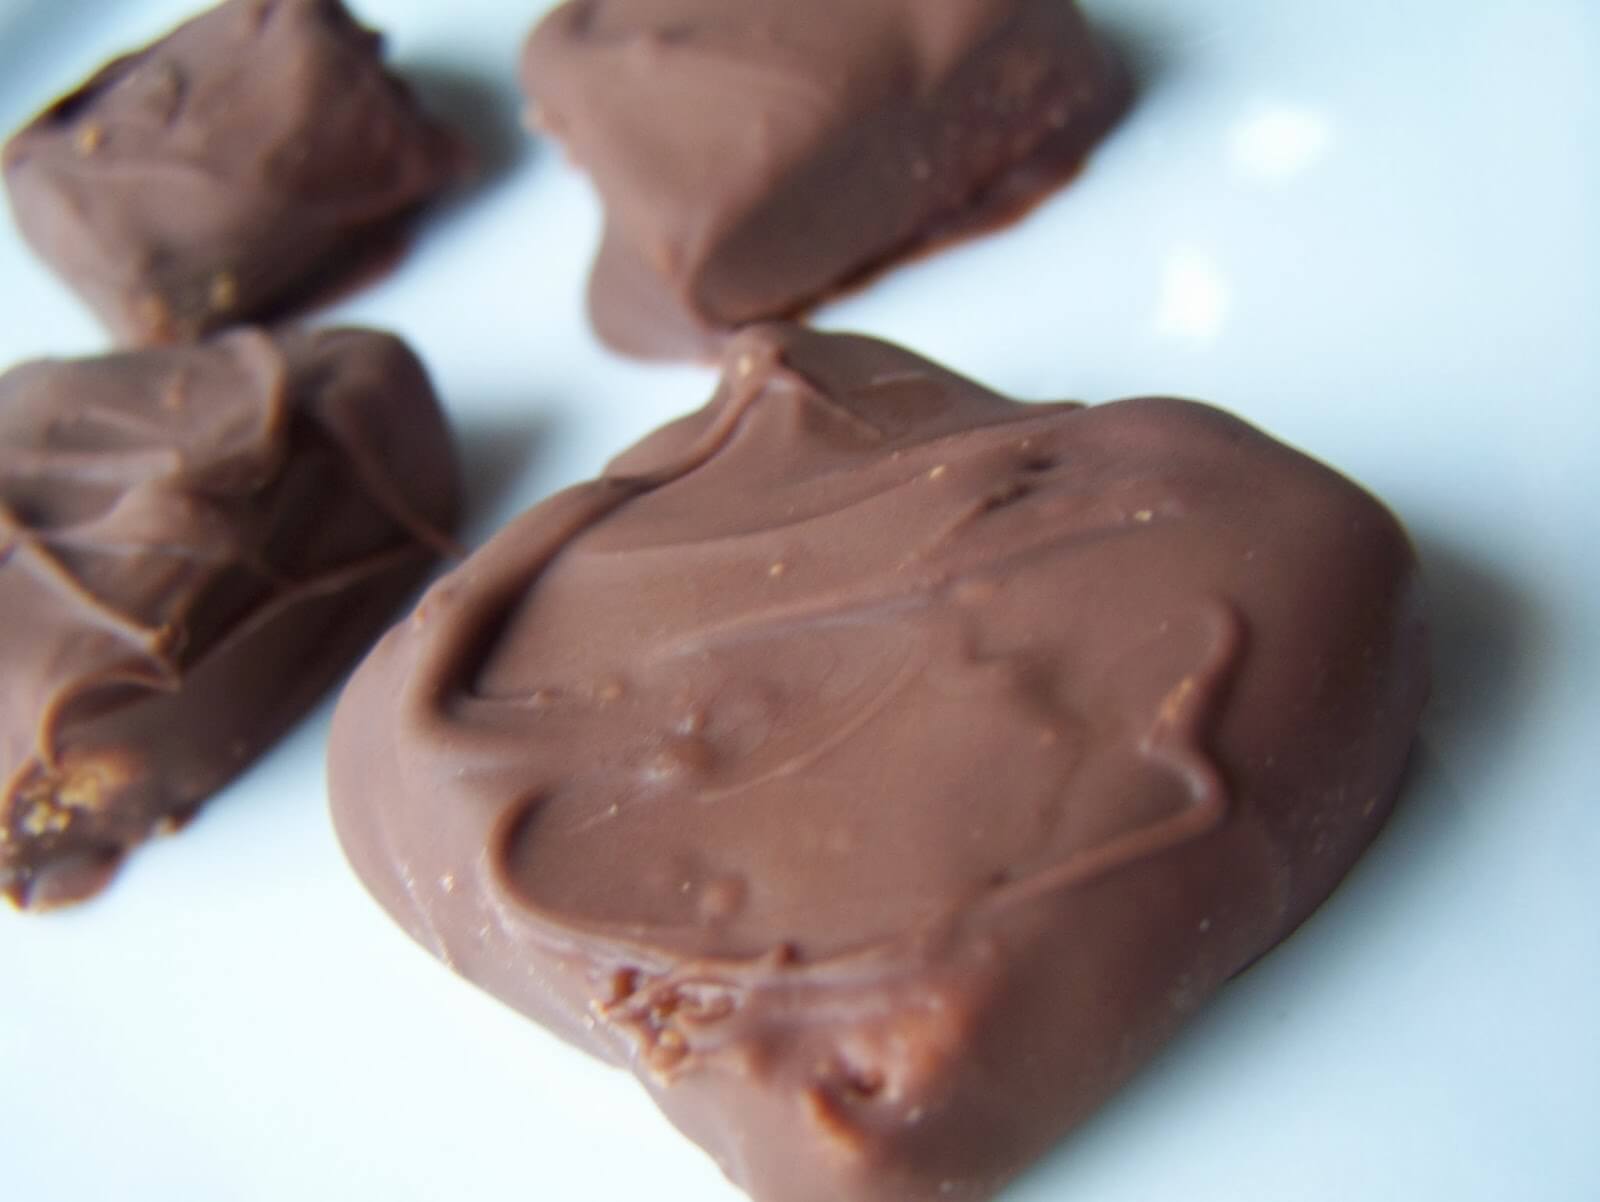
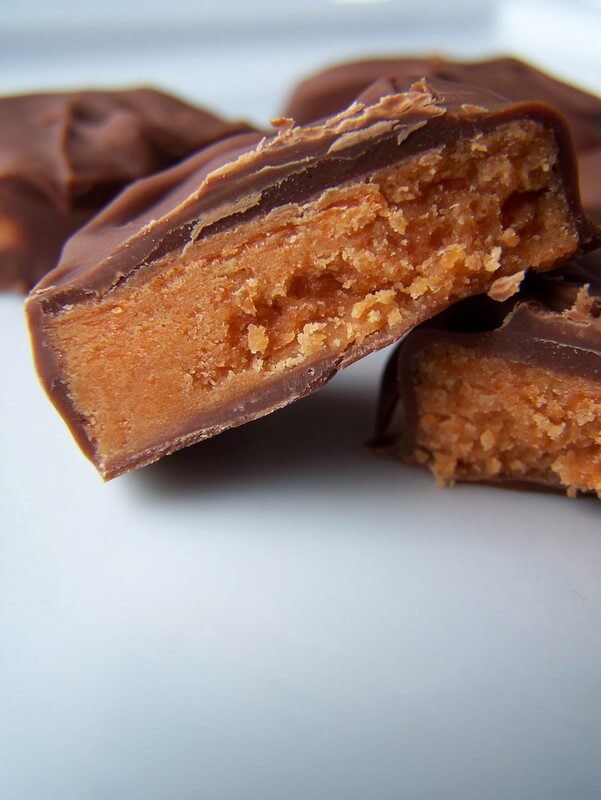
Peanut Butter and Chocolate Molten Cakes

2 eggs, divided
2 Tblsp white sugar, divided
4 Tblsp butter (plus more for greasing)
3 Tblsp chocolate chips
3 Tblsp peanut butter chips
4 tsp flour, divided (plus more for dusting)

Grease and flour two 3-inch ramekins. Place on a baking sheet and set aside.

Whisk one egg with 1 Tblsp white sugar. Combine very well until light in colour. Place chocolate chips and 2 Tblsp butter in a microwave safe bowl, and heat for 20 seconds. Stir well to combine and melt chocolate. Heat longer if necessary to completely melt the chocolate. Add chocolate/butter and 2 tsp flour to the egg/sugar mixture. Whisk to combine. Divide between the two prepared ramekins.

Repeat this process to make the peanut butter layer. Whisk one egg with 1 Tblsp white sugar. Combine very well until light in colour. Place peanut butter chips and remaining 2 Tblsp butter in a microwave safe bowl, and heat for 20 seconds. Stir well to combine and melt chips. Heat longer if necessary to completely melt. Add melted peanut butter chips and remaining 2 tsp flour to the egg/sugar mixture. Whisk to combine. Divide between the two ramekins, pouring on top of the chocolate layer.

Bake at 450` for 8-10 minutes. The sides will be set, but you want to center to still appear sunken and jiggly. To serve, invert ramekin on serving dish. Dust with icing sugar or serve with a scoop of ice cream. Serve immediately.


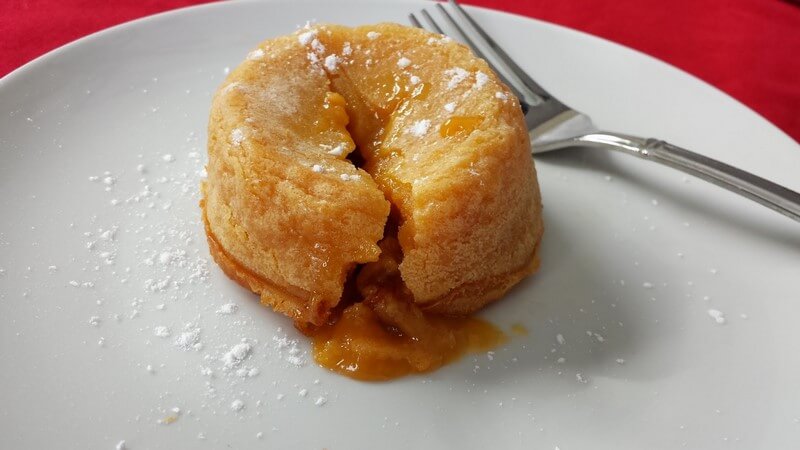
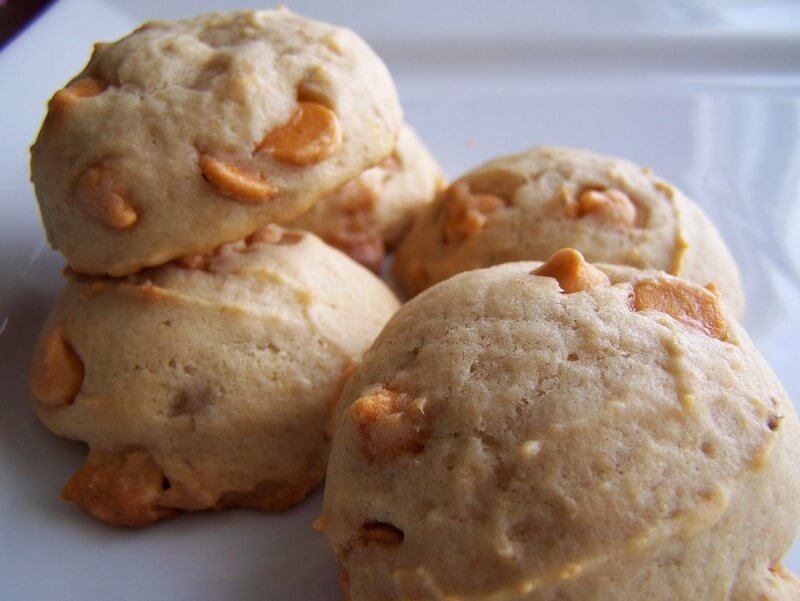
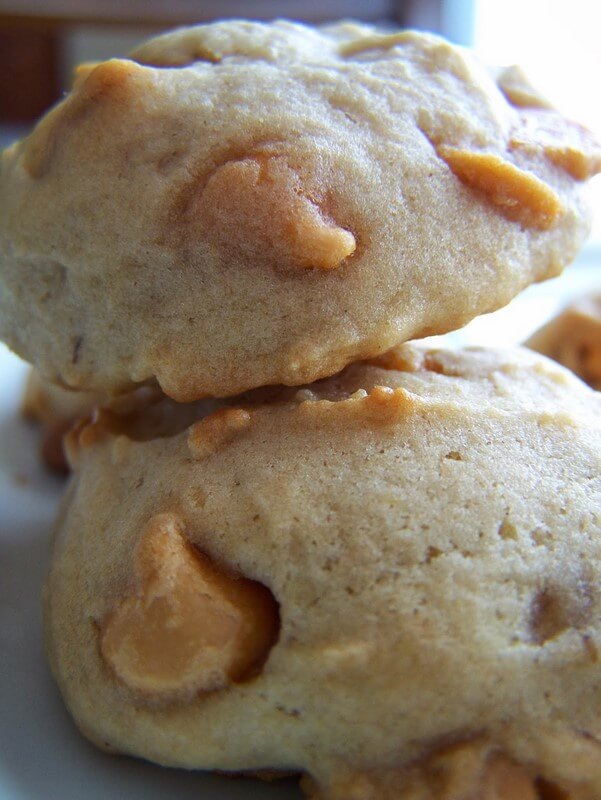
Butterscotch Molten Cakes

2 eggs
2 Tblsp white sugar
4 Tblsp butter (plus more for greasing)
1/3 C butterscotch chips
4 tsp flour, divided (plus more for dusting)

Grease and flour two 3-inch ramekins. Place on a baking sheet and set aside.

Whisk eggs with white sugar. Combine very well until light in colour. Place butterscotch chips butter in a microwave safe bowl, and heat for 20 seconds. Stir well to combine and melt chips. Heat longer if necessary to melt completely. Add melted chips and flour to the egg/sugar mixture. Whisk to combine. Divide between the two prepared ramekins.

Bake at 450` for 8-10 minutes. The sides will be set, but you want to center to still appear sunken and jiggly. To serve, invert ramekin on serving dish. Dust with icing sugar or serve with a scoop of ice cream. Serve immediately.


Peanut Butter Chocolate Squares

This recipe is so nostalgic for me. These squares were a regular recipe for my Nana, and we had them at just about every party growing up. When I posted on my Facebook page asking for suggestions using peanut butter, some of my cousins brought up the idea of this recipe. Once the seed was planted in my mind, I absolutely had to have them!

1/2 C margarine (not the spreadable kind)
1 1/2 C peanut butter
1 tsp vanilla
2 C icing sugar
2 C Rice Krispies
1 bag (approx 2 cups) chocolate chips
2 Tblsp shortening

Melt margarine. Stir in peanut butter and vanilla until well mixed. Add icing sugar and stir until evenly combined. Fold in Rice Krispies until distributed. Press mixture into a 8X8 pan, lined with greased foil. Press very firmly.

Melt chocolate chips and shortening and stir until smooth. (I find this easiest to do in the microwave. Heat for 30 seconds. Stir, then heat at 15 second intervals, stirring after each, until fully melted.) Spread melted chocolate over peanut butter mixture. Chill until set. Cut into squares and store in the fridge, fighting the urge to eat a cold one each time you open the fridge.


Sweet Potato Chocolate Chip Cookies

Cookies without any butter or refined sugar, and instead filled with fibre, protein, and vitamins A & C? Now there is a dessert you can feel good about! These cookies were gobbled up by my wee ones for a treat after school, and my husband and I ate a few more as a late night snack. 

1 C canned white beans, drained and rinsed
2 Tblsp water
1 C baked/mashed sweet potato
2 eggs
1/4 C honey
1 tsp vanilla
1 C flour
1/3 C oatmeal
1 tsp cinnamon
1/2 tsp salt
1 tsp baking powder
1 tsp baking soda
1 C chocolate chips

Using a food processor or immersion blender, puree beans with 2 Tblsp water to yielf 1/2 C bean puree. Combine bean puree with sweet potato, eggs, honey and vanilla. Stir until smooth. In a separate bowl, combine flour, oatmeal, cinnamon, salt, baking powder, and baking soda. Combine wet and dry ingredient until moistened. Stir in chocolate chips. 

Drop by spoonfuls onto cookie sheet and flatten slightly. Bake at 350` for about 12-15 minutes, until done. These cookies are best served the same day.


Cookies and Cream Popcorn

It's no secret that I love candy popcorn. I have eaten my weight in Peppermint Bark Popcorn over the last couple of Christmases, I nearly made myself sick on Cinnamon Bun Popcorn, and who could forget S'more Popcorn? This cookies and cream concoction was a hit with my chocolate-loving family. (A great addition would be some chopped Hershey Cookies N Creme bars!)

6 C air-popped popcorn
6 oz white chocolate, melted
15 Oreo cookies, coarsely chopped
Kosher salt, to taste

In a large bowl, toss popcorn with cookie pieces to distribute. Melt chocolate in a double-boiler or in the microwave. Pour over popcorn/cookie mixture. Quickly stir to coat. Spread in a single layer on a parchment or silpat lined baking sheet. Allow to harden as chocolate cools. Break into bite-sized pieces. Store in an air-tight container until serving.


Banana, Butterscotch, Browned Butter Cookies

We have had a lot of "snow days" this winter and in our house that means baking, crafts, and movies. On a recent snow day, we experimented by creating this new cookie recipe to make use of an over-ripe banana and Simon's beloved butterscotch. (Seriously, he is a butterscotch monster. He would do just about anything for a couple butterscotch chips.) The cookies were light and delicious, and were loved by the whole family. 

For all my fellow fans of The Office, writing the title of this recipe (with all the B words) made me think of the episode where Jim does an imitation of Dwight, and says "Beets, Bears, Battlestar Gallactica" For all those who didn't watch The Office, go ahead watch that YouTube clip or just continue thinking I am crazy.

1/2 C sugar
1 egg
1/2 C mashed ripe banana
1 tsp vanilla
1 1/2 C flour
1 tsp baking powder
1/2 tsp baking soda
1/2 tsp salt
3/4 C butterscotch chips

Cut butter into pieces and melt over medium heat, stirring constantly. It will foam, then begin to darken. Watch carefully as the butter turns brown, and some little brown flecks can be seen at the bottom of the pot. The butter will begin to have a nutty smell. Remove from heat, and allow to cool.

Beat butter and sugar until smooth. Add egg, mashed banana, and vanilla. Beat until smooth again. Combine flour, baking powder, baking soda, and salt. Add to wet mixture and mix well. Fold in butterscotch chips. Drop by spoonfuls on to a silpat or parchment lined baking sheet. Bake at 350` for 12-15 minutes.


Recipes from Valentine's Past

While brainstorming some Valentine's Day treats to make for my family this year, I revisited some of my projects from past years. If you are looking for some fun and festive treats, look no further!


Walnut Toffee

The first time my cousin made this recipe, I think I actually moaned when I took a bite. This is such an amazing treat! Rich and buttery, and perfectly crunchy. 

I have altered the original recipe slightly, cutting back the quantity walnuts. I prefer not to have walnuts in every single bite, and I feel like the toffee cuts more evenly with less walnuts. These are mouth-wateringly addictive sweets with a perfect crunch. They don't survive long in my house, or anywhere else I take them!

3/4 C brown sugar
1/2 C butter
3/4 C chopped walnuts
1/2 C chocolate chips

Sprinkle walnuts evenly on the bottom of a 9X9 pan. Over high heat, melt butter and sugar together. Heat until boiling. Lower to medium heat, and boil for 7 minutes, stirring constantly. Pour butter mixture over walnuts and spread evenly. Sprinkle chocolate chips evenly on top. Cover with a baking pan to keep the heat in and let the chocolate melt. After several minutes, spread the melted chocolate to cover the butter mixture. Cut into small squares while still hot - just scoring the butter/walnut layer. Chill in the refrigerator until cold and set. Snap into pieces. For best results, store in the refrigerator or a cool dry place.


Homemade Butterfingers

Isaac, my oldest son, has a peanut allergy. Throughout the year, it's a pain to read all the labels, to eat cautiously when we are out, to worry about what he may be offered at parties...but I feel like Halloween is our annual reward. Once the kids get home from trick or treating, we go through their bags and take out anything that contains peanuts or that isn't well-labeled. Once they goes to bed, we PIG OUT on peanut-ridden treats. And we love it. There's my confession. One night a year, I like my child's allergy. Does that make me a horrible mother?

This year, the kids didn't bring home a single Butterfinger. In fact, they got very few treats containing peanuts. Perhaps people are being extra cautious this year? All I know is that their bags were completely lacking Butterfingers, and had a grand total of three Reese's Peanut Butter Cups. (Our annual pig-out was a little lackluster this year, to say the least.) As I was lamenting the lack of Butterfingers to Josh, I recalled that my cousin had made a knock-off recipe last year and shared them with us. They were great, but I hadn't actually tried the recipe myself. Desperate times call for desperate measures, so I made them. As crazy as this recipe sounds, they were awesome! 

(This recipe is all over the internet and I don't know where to give credit, but I first saw the recipe here, on Plain Chicken)

1 C candy corn
1 C smooth peanut butter
1 C (+/-) chocolate chips

Place candy corn in a large microwaveable bowl. Heat for 1 minute. Stir, and heat for an additional 30 seconds. Heat and stir at 30 second intervals until melted. Add peanut butter and stir well. The candy corn will seize (similarly to when you add flavouring to melted chocolate). If that happens before the candy corn and peanut butter are thoroughly combined, microwave for another 30 seconds before stirring the mixture again. Spread into a large loaf pan, lined with parchment. Place in freezer until hardened.

Remove peanut butter mixture from freezer once hardened, and cut into pieces as desired. (I made my bite-sized like the "fun size" Halloween bars). Melt chocolate chips by microwaving, stirring each 30 seconds. Dip bars in chocolate to coat. Place on parchment to set. Store finished bars in the freezer.


It's amazing how similar the texture is to a real Butterfinger. As someone who doesn't like candy corn, I can attest to the fact that you certainly would never guess they were in these bars!

Sweet and Salty Bark

Bark is one of those fun treats that's easy to make and impossible to mess up. You can use just about whatever tickles your fancy, and there are oodles of way to make it seasonal or fit a theme. I made this Halloween bark for a fun treat this weekend, but it could be tweaked for any occasion. Use red and green candy at Christmas time, red or pink candy for Valentines Day, pink or blue candy for a baby shower, etc.

Most of the "pretty barks" (like this or this) are made a little differently than the technique below. Generally, bark is made by spreading melted chocolate in a thin layer, then topping as desired. I prefer to coat some ingredients in chocolate as a base because I like the texture it gives, and I find it cuts how over-powering the chocolate can be. And coating some crunchy ingredients in white chocolate makes this recipe a little reminiscent of Clodhoppers...and I love Clodhoppers!


4 C salted pretzels, broken into pieces
9 Golden Oreos (one row), chopped
8 Fudgeeos (one row), chopped
10 oz white chocolate, chopped and melted
1/3 C semi-sweet chocolate chips, melted
1/4 C (+/-) Mini M&M's
2 Tblsp (+/-) Halloween sprinkles

Combine broken pretzels and chopped cookies in a large bowl. Melt white chocolate according to package directions. Once fully melted, stir into pretzel and cookie mixture to coat. Immediately spread onto a parchment-lined baking sheet and flatten as much as possible. Melt chocolate chips, and drizzle on top. Sprinkle with Mini M&M's and sprinkles. Allow to harden completely before breaking into chunks.

Mmmmm....Sweet sweet cookies, and salty salty pretzels!


TOFUdgicles

Tofu meets the fudgicle. Magic, courtesy of Weelicious chocolate tofu pudding. These are were a hit with our whole family, and make a deliciously filling protein-rich snack.

1 pkg tofu
1/3 C cocoa
2/3 C sugar
1 Tblsp vanilla

Combine all ingredients in blender or with immersion blender until smooth. Freeze in popsicle molds overnight.

Look at Isaac's eyes - dying for a lick while he waits for me to take the photo...

First Attempt of Fondant

I am a pretty good cook, and a pretty good baker...but a cake decorator I am not. I don't think I've ever been satisfied with the way one of my decorated cakes has turned out. Sure, they are yummy (this buttercream is my delicious go-to), but I always just wished that they would be pretty too!

After reading lots of posts about marshmallow fondant, I decided to give it a try for a Father's Day Cake. My kids chose a Superman card at the store, and the three-year old thought that the cake should match. I gave it a shot!

4 C marshmallows
2 Tbsp water
3 3/4 C icing sugar
shortening or veg oil (to keep it from sticking to everything in a 3-foot radius)

Get everything out, measured, and ready ahead of time because it goes quickly and your hands will be sticky! Grease the inside of your Kitchenaid bowl, as well as the dough hook. In 30 second intervals, microwave the marshmallows and water in a large bowl. Stir after each 30 seconds until fully melted. Combine marshmallow mixture and icing sugar in the greased bowl. Mix on a low speed until most of the sugar is mixed in, then increase speed a little (mostly just so the sugar doesn't fly out of the bowl).  Watch in amazement as the goo transforms into a smooth ball that looks like a bright white dough!

Remove from bowl and place onto a greased surface (counter or cutting board). Grease hands and knead. If super sticky, knead in more icing sugar until it is glossy and just tacky. Wrap tightly and let stand for at least an hour to cool off to room temperature.

There are oodles of websites and blog posts that offer tips on how to roll out, cut, and apply the fondant...check them out and find something that will work for you. I rolled mine out on a greased surface and found it really easy to handle (much easier than expected). 

I definitely don't LOVE the result of my first fondant attempt, but I don't hate it...and it was fun! I'm looking forward to trying it again soon. If I was doing the same design again, I'd either cut the whole pentagon out as one piece (to eliminate the seams) or cut in pieces, assemble, and rub out all the seams on my greased surface to make it look like one piece.

(The cake is on a piece of painted pottery, in case you thought colour was bleeding out of the fondant)

Bring on the next birthday cake! My three-year-old is having a pirate themed party in August. Time to start looking for some ideas. Maybe this?

Tiramisu

Lady Fingers were on sale last week and I planned to pick some up to have on-hand to make tiramisu sometime. (Because when I wanted to make it several years ago, I had a hard time finding any) When I got to the store, there was a clearance on ricotta cheese. Of course, traditional tiramisu is made with marscapone, but I figured I could find a ricotta based recipe somewhere...And I did! This was SO good, and ridiculously easy. It would be great to serve for a dinner party because all the prep is done the day before.

1 lb ricotta
1 egg
2 Tbsp rum
1/2 tsp vanilla 
1 C sugar
1/2 C (+) strong coffee
Lady Finger biscuits (it took 2 1/2 packages of "giant" lady fingers)

1/2 tsp (+/-) cocoa

Combine first five ingredients in food processor and whiz until smooth (a minute or so). Lay biscuits in a single layer in the bottom of a 9x13 dish. Drizzle half the coffee over them (I found I needed a little more than 1/2 cup). Spread half of the ricotta mixture over evenly over the top. Repeat with second layer, and dust top with cocoa. Refrigerate for 6 hours or overnight.  Slice to serve.


I found a tea ball to be perfect for getting the cocoa sprinkled lightly enough, and getting it evenly into the corners.